In the previous section, you forked the example project repository in GitHub. Now you will learn how to add that project to CircleCI.
Step 1 — Adding the project to CircleCI
- Go to your CircleCI dashboard. If you haven’t signed up at this point, log in with your GitHub credentials

- On the left-hand side, click the Projects section and you will land here:
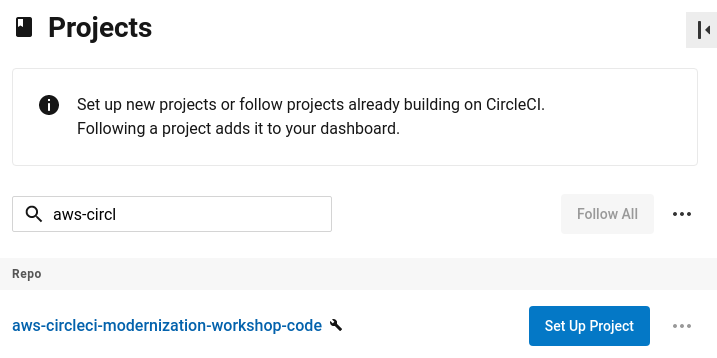
- Click Set Up Project next to the name of your new project
- On the New Project Set Up page, select the Fastest option
- Type main in the branch text field

- Click the Setup Project button
Congratulations! You have just triggered your first pipeline build on CircleCI. The example project is using the default config.yml file with the default pipeline definition. The pipeline definition will trigger the first build in your new project. Over the course of this workshop, you will replace the entire contents of this file.
Step 2 — Configure project environment variables
Before you start building your pipeline, you must create project environment variables to provide integration access to the services you previously registered for. All of the access and API tokens you previous generated will be assigned to new project environment variables that will serve as values in your config syntax.
Now you will create new project environment variables in CircleCI using those keys and tokens you previously created.
On your CircleCI dashboard, navigate to Project Settings > Environment Variables in the CircleCI control panel. Add these keys and values in their respective fields:
Name: AWS_ACCESS_KEY_ID
Value: Your AWS IAM Accounts Access Key ID

Name: AWS_SECRET_ACCESS_KEY
Value: Your AWS IAM Accounts Secret Access Key

** Note: Only use during AWS hosted events. Otherwise ignore **

    Name: AWS_SESSION_TOKEN
    Value: Your AWS IAM Accounts session token

**

Name: DOCKER_LOGIN
Value: Your Docker Hub user name

Name: DOCKER_PASSWORD
Value: Your Docker Hub Access Token

Name: SNYK_TOKEN
Value: Your Snyk Access Token

Name: TERRAFORM_TOKEN
Value: Your Terraform Cloud API Token
After entering all of these environment variables, the environment variables dialog should look something like this.

Click the X in the top right corner to return to the pipeline dashboard.
Your project is now set up in CircleCI and you can start building a new pipeline for your project.