Trigger the Pipeline
Congratulations! You have created all the jobs and workflows required for your project’s pipeline to trigger. As you’ve been progressing through this workshop, you’ve been learning about Continuous Delivery, Continuous Integration, DevSecOps, Infrastructure as Code and Continuous Deployment and all of those concepts combined compose CI/CD. In this section, you’ll trigger and execute the awesome CI/CD pipeline that you been building.
Final config.yml file
Before you can trigger your CI/CD pipeline you must have a well defined config.yml file to execute. As you’ve progressed through the modules, you been pasting jobs and learning about what they accomplish along the way.
The code snippet below represents the final pipeline config.yml file for this workshop. Please ensure your config.yml is identical to this:
version: 2.1
orbs:
  snyk: snyk/snyk@1.2.3
  aws-cli: circleci/aws-cli@2.0.2
  node: circleci/node@4.2.0
  docker: circleci/docker@1.5.0
  terraform: circleci/terraform@3.0.0
jobs:
  run_tests:
    docker:
      - image: cimg/node:14.16.0
    steps:
      - checkout
      - node/install-packages:
          override-ci-command: npm install
          cache-path: ~/project/node_modules
      - run:
          name: Run Unit Tests
          command: |
            ./node_modules/mocha/bin/mocha test/ --reporter mocha-junit-reporter --reporter-options mochaFile=./test/test-results.xml
            ./node_modules/mocha/bin/mocha test/ --reporter mochawesome --reporter-options reportDir=test-results,reportFilename=test-results
      - store_test_results:
          path: test/
      - store_artifacts:
          path: test-results
  scan_app:
    docker:
      - image: cimg/node:14.16.0
    steps:
      - checkout
      - run:
          name: Snyk Scan Application files
          command: npm install
      - snyk/scan:
          fail-on-issues: false
          monitor-on-build: false
  build_docker_image:
    machine:
      image: ubuntu-2004:202101-01
    resource_class: arm.medium
    steps:
      - checkout
      - docker/check
      - docker/build:
          image: $DOCKER_LOGIN/$CIRCLE_PROJECT_REPONAME
          tag: 0.1.<< pipeline.number >>
      - docker/push:
          image: $DOCKER_LOGIN/$CIRCLE_PROJECT_REPONAME
          tag: 0.1.<< pipeline.number >>
  deploy_aws_ecs:
    machine:
      image: ubuntu-2004:202101-01
    resource_class: arm.medium
    steps:
      - checkout
      - run:
          name: Create .terraformrc file locally
          command: echo "credentials \"app.terraform.io\" {token = \"$TERRAFORM_TOKEN\"}" > $HOME/.terraformrc
      - terraform/install:
          terraform_version: "1.0.2"
          arch: "arm64"
          os: "linux"
      - terraform/init:
          path: ./terraform/ecs
      - terraform/plan:
          path: ./terraform/ecs
      - run:
          name: Terraform apply
          command: |
            terraform -chdir=./terraform/ecs apply \
              -var docker_img_name=${DOCKER_LOGIN}/${CIRCLE_PROJECT_REPONAME} \
              -var docker_img_tag=0.1.<< pipeline.number >> \
              -auto-approve
            export ENDPOINT="$(terraform -chdir=./terraform/ecs output load_balancer_hostname)"
            mkdir -p /tmp/ecs/
            echo 'export ENDPOINT='${ENDPOINT} > /tmp/ecs/endpoint
      - persist_to_workspace:
          root: /tmp/ecs/
          paths:
            - "*"
      - run: sleep 90
  smoketest_deployment:
    machine:
      image: ubuntu-2004:202101-01
    resource_class: arm.medium
    steps:
      - checkout
      - attach_workspace:
          at: /tmp/ecs/
      - run:
          name: Smoke Test ECS Deployment
          command: |
            source /tmp/ecs/endpoint
            ./test/smoke_test $ENDPOINT
  destroy_aws_ecs:
    machine:
      image: ubuntu-2004:202101-01
    resource_class: arm.medium
    steps:
      - checkout
      - run:
          name: Create .terraformrc file locally
          command: echo "credentials \"app.terraform.io\" {token = \"$TERRAFORM_TOKEN\"}" > $HOME/.terraformrc
      - terraform/install:
          terraform_version: "1.0.2"
          arch: "arm64"
          os: "linux"
      - terraform/init:
          path: ./terraform/ecs
      - terraform/plan:
          path: ./terraform/ecs
      - terraform/destroy:
          path: ./terraform/ecs
workflows:
  build:
    jobs:
      - run_tests
      - scan_app
      - build_docker_image
      - deploy_aws_ecs:
          requires:
            - build_docker_image
      - smoketest_deployment:
          requires:
            - deploy_aws_ecs
      - approve_destroy:
          type: approval
          requires:
            - smoketest_deployment
      - destroy_aws_ecs:
          requires:
            - approve_destroy
Triggering this CI/CD Pipeline
Now that you have your well formed config.yml ready to execute, let’s trigger this pipeline and make magic happen. To trigger your pipeline all you have to do is perform a git commit locally and push your changes upstream. Below demonstrates how to perform this from a terminal:
git commit -a -m"Trigger the initial pipeline run."The next command will push the commit upstream and trigger the pipeline
git pushAfter the git push command is executed you can jump over to the CircleCI Dashboard and you should see your pipeline executing similar to the example below:

Manually verify the application deployment
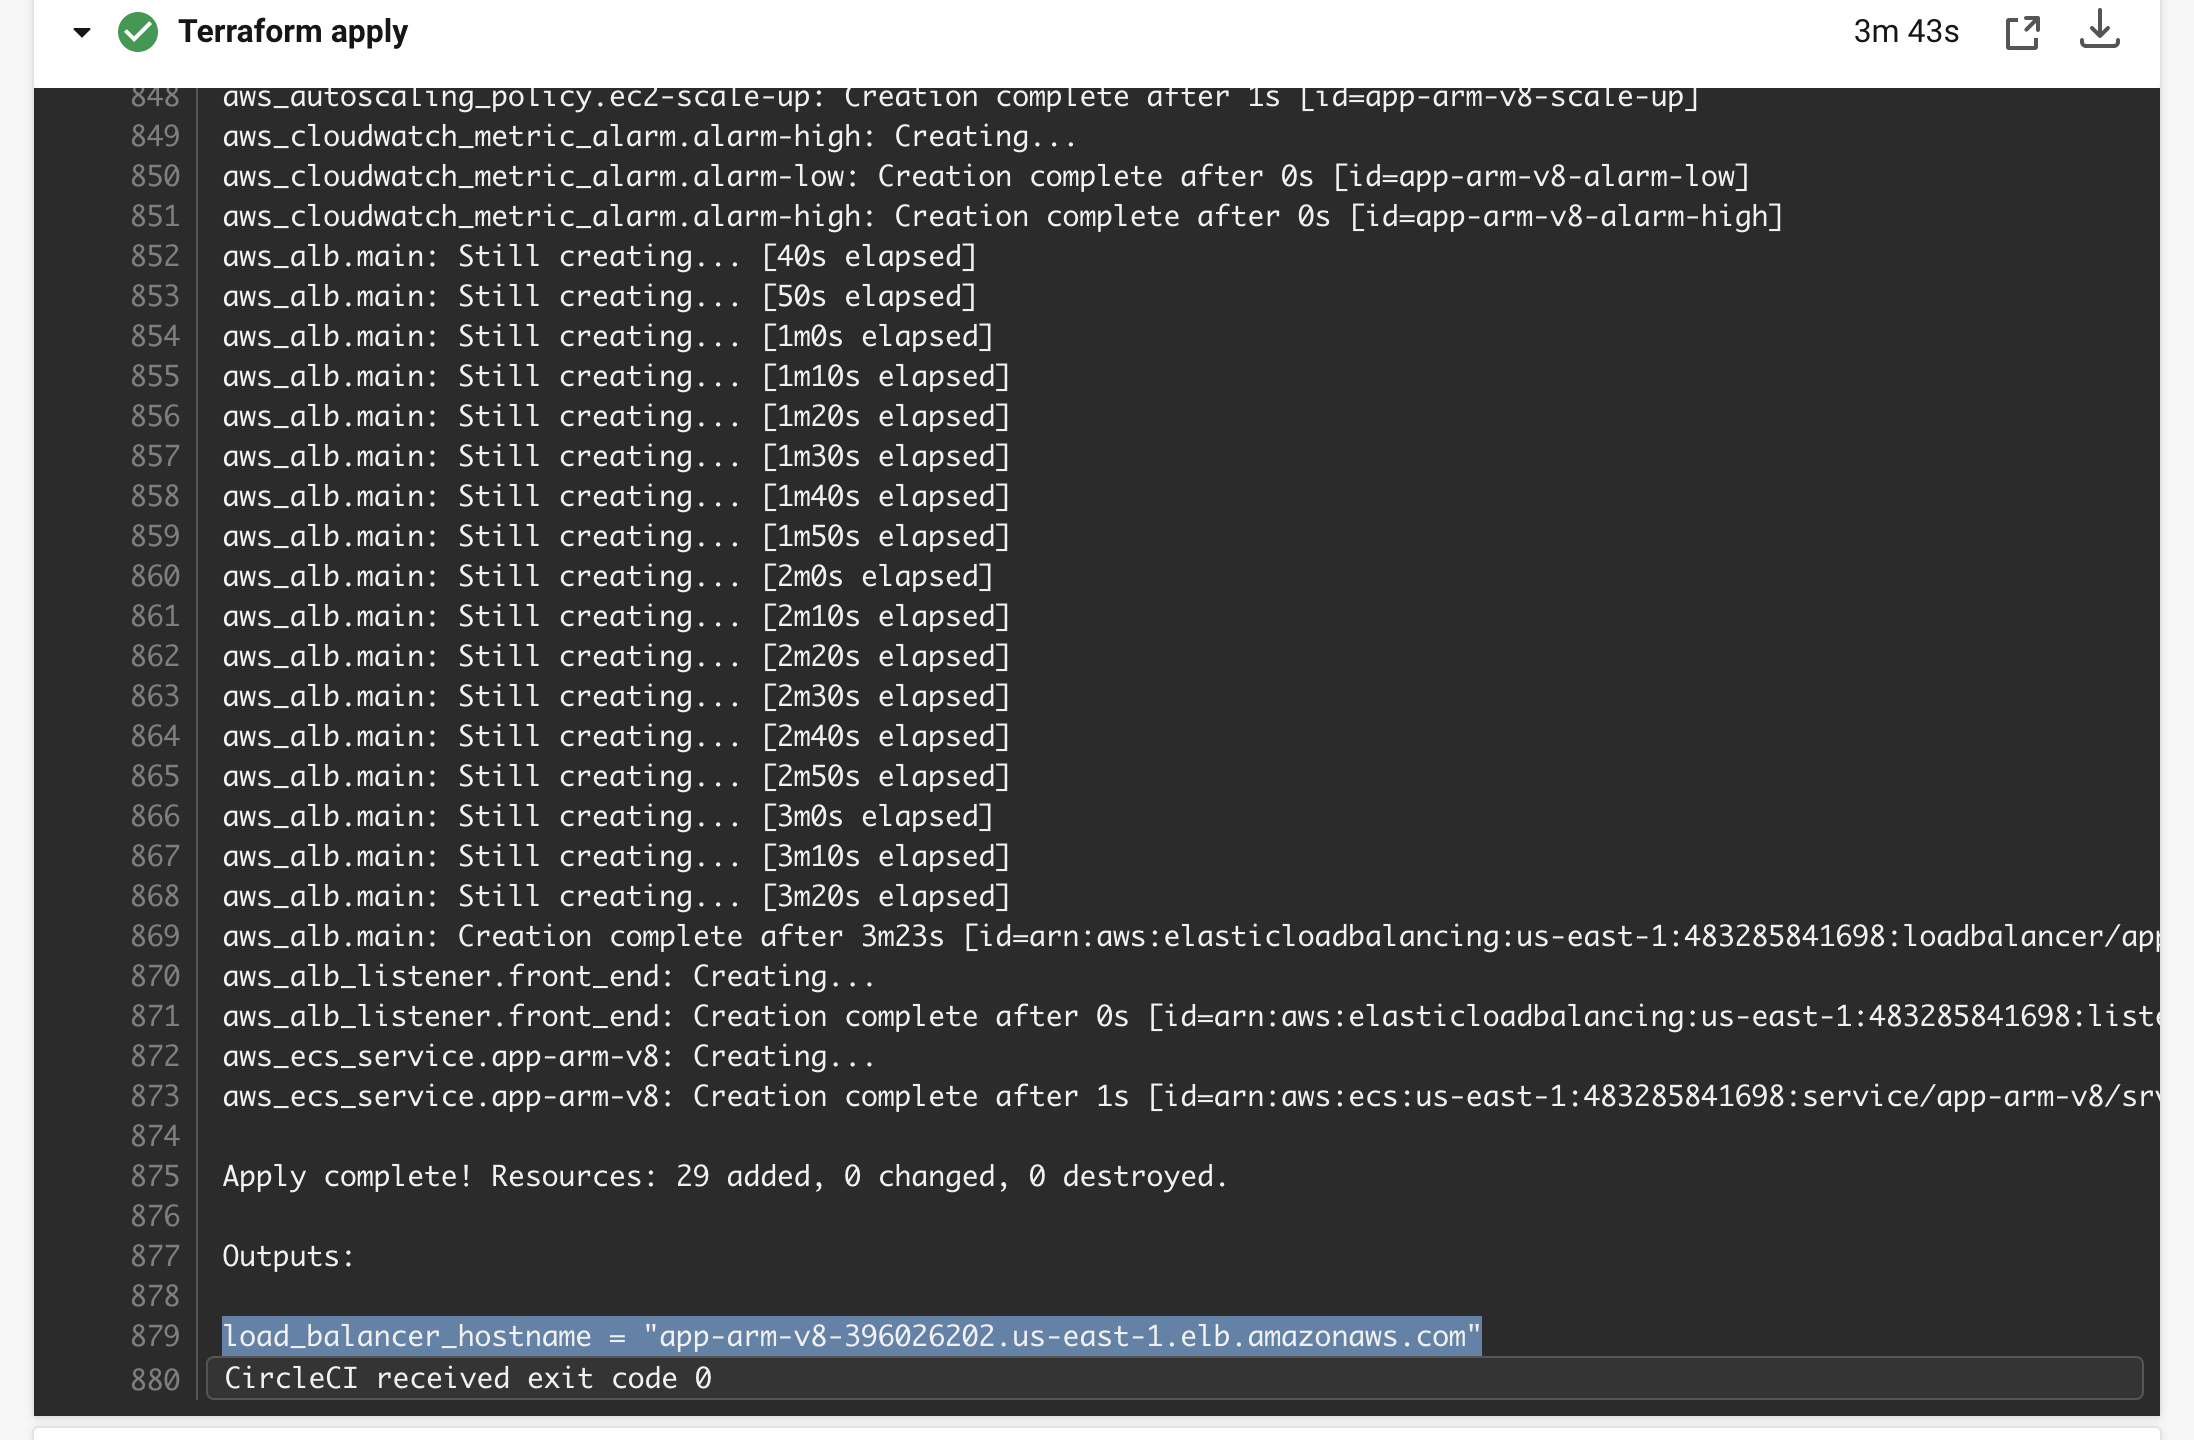
After the smoketest_deployment job successfully completes, the pipeline will stop at the approve_destroy approval job and will require manual intervention to continue executing. Before you manually approve the pipeline continuation, you should see your application actually running. In the CircleCI dashboard, click the create_deploy_app_runner job and then click the Create and Deploy App Runner dropdown to get your apprunner_service_url and paste it into a browser to see the application running live in your newly created App Runner service. The image below shows where to find the url but be aware, your url value will be completely different from the example.
Manually approve the destroy jobs
Now that the smoketest_deployment job has successfully completed and you’ve verified the application is live and functioning, it’s time to click the approve_destroy button in the dashboard and continue the pipeline which will execute the destroy jobs and destroy the unnecessary infrastructures and resources created in previous jobs. The image below shows a paused pipeline awaiting an approval button click.
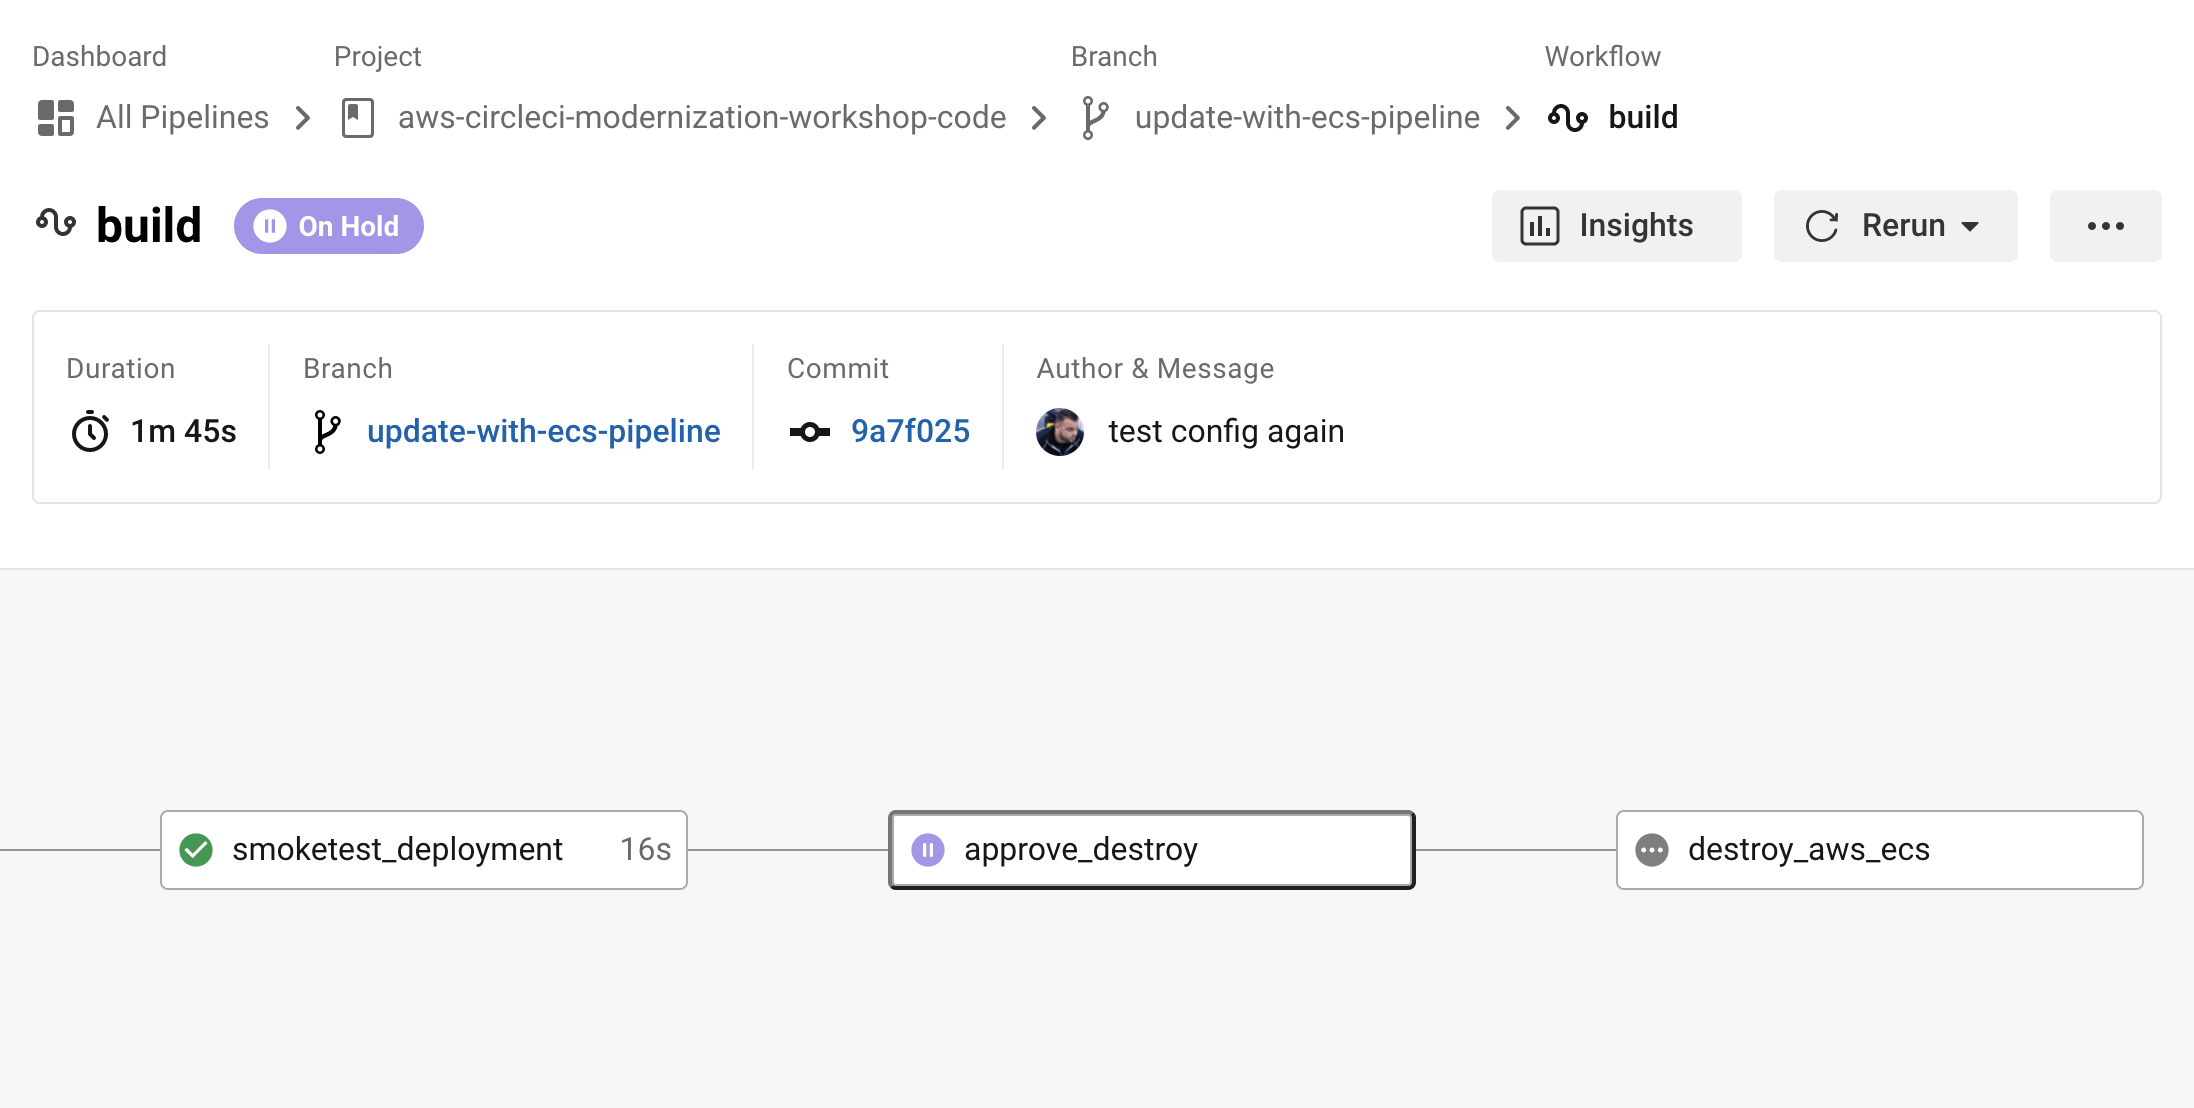
Click the approval button and watch your pipeline execute the destroy jobs that will terminate all of the AWS resources and infrastructure created to test your application deployment.
Module Summary
Congratulations! You successfully completed this workshop and have learned the following:
- Deploy Cloud9 as an IDE for completing workshop exercises.
- Setting up project repositories in CircleCI
- Creating CI/CD pipelines and segments for:
- Automated testing
- Security scans (DevSecOps)
- Building Docker images
- Infrastructure as Code (IaC) using Terraform
- Deploy applications
- Integrating the following services in CI/CD pipelines:
- Snyk: app and container image scanning
- AWS Public ECR: push Docker image to public AWS ECR repository
- Terraform: codify and provision AWS resources and infrastructure
- Terraform Cloud: centrally manage state of provisioned infrastructure
In the next module, you will perform some Cleanup actions.